Posts

Showing posts from August, 2015

Enjoy!

Image
©Michele Emerson-Roberts  2015 I remember playing with “whirly gigs” as a child…… do you? They were fun and easy to obtain. It was such fun to run and run and watch the wind make them whirl. Wouldn't it be wonderful to be a kid again!   Supplies: Any of the Arnold Grummer paper making kits Scraps of pink  and white paper (think junk mail) Blender, sponges & soft towels Microwave, heat gun or sunny window Scor-pal ™ (LOVE the new 1/8” version) Die: CheeryLynn # B413 “Enjoy” Spellbinders ’ Grand Calibur II™ die cutting machine Westcott™ scissors Two pieces 2” square of patterned paper ColorBox ™ light pink Chalk ink pad, Stylus™ handle & tip Beacon QuickGrip™  and ZipDry™ adhesive Scrap of white handmade paper Pencil, 1/8” round hole punch Two tiny white brads Instruction: Follow the instructions found in any of the AG paper making kits or books to create one sheet o
Paper Flowers with Tamiko

Image
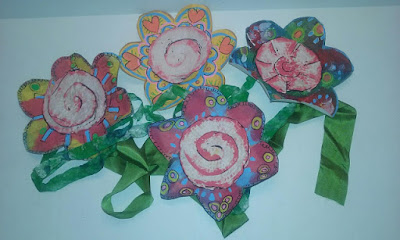
I love handmade flowers.  i honestly love them more than real ones!  Weird huh?  Yet true!  With the  Arnold Grummer's (AG) Seed Paper Flowers Kit  , not only do I get to create my personally handmade paper, I also get to encourage the recycling by creating seed papers which is MORE than AWESOME! This procedure only requires the kit mentioned above, some paper you would like to recycle,  tissue tints  (for coloring the paper, if you aren't already using colored papers), a blender (preferably one you use for paper making or craft, a bowl less than six inches in diameter, some water,  a few dry rags or couch sheets and flowering seeds. you will also probably want some markers or pens to decorate your intended leaves or petals. I took some torn bits of scrap paper, about a handful, and placed them in 2.5 cups of water in the blender.  I let the paper soak for about 20 minutes while I drank a cup of coffee and read email, hey I am a multitasker!  I then turned the blen

Believe Fan Book

Image
©Michele Emerson-Roberts 2014 Each of these little books is full of quotes related to the title on the cover of the book. Several friends are going through some rough patches in their lives and these books will perhaps give them some comfort. Join me in creating this fan book for Debbie. Supplies: Any of the Arnold Grummer™ paper making kits A sunny window Blender, cello sponges and soft towels Personal paper cutter, scissors Beacon ZipDry™ Adhesive, double sided foam tape or dots Scraps of black paper (think junk mail, left over cardstock scrap, etc.) One or more of AG #2718 Mini Fan Book Verbiage stamps and black ink pad or computer generated quotes or sayings ColorBox ™ Stylus™ handle and soft tip Small scrap of chip board Dies: CheeryLynn™ corner flourish Die cut machine: Spellbinders ’ Grand Calibur Instructions: Follow the directions found in any of the Arnold Grummer™ paper making kits to create

Children of the Sea Zig Zag journal

Image
Howdy everyone! I am so looking forward to going on my art-cation next month with my good friend Anna, we are going to sketch, watercolor, make "ocean" paper and have all sorts of fun, art filled days! I wanted to make a special journal to do some sketching in while I am down at the beach so I created a themed journal from one of the Tall Zig Zag books that Arnold Grummer makes. They are so cool and easy to put together that I can see them as great gift giving ideas too...and you know what is approaching quickly in 126 days! yikes!! ( hint: starts with a C....) However, this one is going to be for moi! I did use regular card stock to cover the book since I didn't have any handmade paper large enough on hand ( my bad!! ) but I did have a yummy piece of hand made paper that screamed "sea" to me and I used it to layer on the top of the card stock. I just love those deckled edges hanging over the edges of the cover, sure I could have cut them off..

Microwave Flower Press

Image
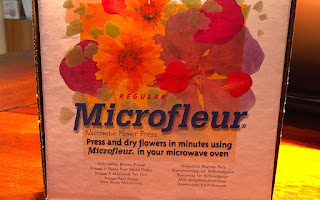
Hello, it is I, Ann , from the blog over at :  http://annnmakes.blogspot.co and the Design Team here at Arnold Grummer.  Today I am excited to share with you my review and experience with the Regular Microfleur®, available here at the Arnold Grummer Paper Making store/site.  The Microfleur® (micro for Microwave and Fleur is french for flower) is a Microwave Flower Press which makes the process of pressing and drying flowers and other specimens so easy.  In a matter of minutes you can use the Microfleur® to preserve some of your own garden's beauty beyond its blooming season. The point of pressing, drying , and saving these flowers as crafters and artists is so we can add these to our projects.  Pressed flowers and leaves added to pulp in the paper making process creates interesting pieces.  The dried specimens can be used in a wide variety of creative applications.   Every microwave oven varies in power and therefore will dictate how long it takes for each type of p

Paperweight

Image
The other day I was organizing the part of my craft room when I store all the stuff that I've accumulated thinking that someday I'd include it in a project. I have an assortment of frames, boxes—some wooden with glass tops, some chipboard—coasters, glass panels, and other oddities that I know someday will be just the perfect thing. In among the accumulation was this beautiful solid glass domed paperweight. I knew as soon as I saw it again, that it would be perfect for showcasing one of the flowers that I'd dried with Arnold Grummer's Garden Press . I carefully peeled away the original velvet paper backing so I could reuse it, and removed the stock photo that was is the paperweight. I cut a circle of my handmade paper, made using basic papermaking techniques. I secured the dried pansy with a tiny droplet of quick dry adhesive, and let the glue dry completely before reassembling the paperweight. I inserted the handmade paper circle with the dried pansy, and reattache

Paper Cast Handmade Journal

Image
©Michele Emerson-Roberts  2015 You may know that I love journals and handmade books - any shape or size! I make them by the batch and always have a wonderful gift ready for whatever the occasion. Creating journals with handmade paper and castings makes them even more special. There are so many molds available from AG - pick one and follow along with the instructions below to create some of your own.   Supplies: Any of the Arnold Grummer paper making kits Blender, sponges and soft towels AG mold #711 Gingko Leaf (or mold of your choice) Scraps of tan and off -white paper (think junk mail) Roylco Rubbing Plates (texture sheets) Japanese screw punch & 1/8” bit, scissors Scor-Pal (LOVE the new 1/8” version) Beacon QuickGrip™ or ZipDry™ adhesive Stick for spine approx. 5 ½” Heavy thread to match the paper for the binding Piece of Palm frond or bark A small amount of old spices and/or tiny pieces of dried g

Mixed Media Canvas with Tamiko

Image
Hey folks, Happy Wednesday to you!  I am forever loving the process of learning to create my own paper.  Arnold Grummer  has laid down an awesome foundation that many have and will continue to learn from.  Check out and subscribe to the Arnold Grummer's YouTube channel by  clicking here . Today I made a canvas.  I used one of molds my friend Mitzi gifted me.  Arnold Grummer has a plethora of  casting molds  available for you on the website.  After reading  The Art of Paper Casting , a book that can be purchased on the site, I learned how to properly prepare a mold for casting paper.  Almost like baking in a pan, you usually start out brushing a little oil on the mold to assist with the release of the paper cast.  You don't have to do it every time, but if you ever have a problem removing a dry cast from the mold.. that is one sure way to resolve it. I learned after I finished my project that I could in fact spray my castings with a workable fixative or brush on some typ

Elegant Card Trio

Image
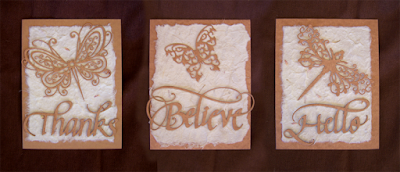
©Michele Emerson-Roberts    2015 Creating elegant and beautiful cards is a snap! Adding handmade paper is like icing on the cupcake. These three cards went together so quickly – as in less than 5 minutes each, and are sure to be a hit with the recipients. They would be wonderful in any color scheme. I chose to save some time and used purchased cardstock in a soft warm cinnamon color for the card bases and die cuts. Supplies: Any of the Arnold Grummer  paper making kits A sunny window or traditional oven Blender, small strainer, cello sponges and soft towels Scraps of ivory paper (think junk mail, etc.) Tiny pieces of  dried  flower petals, spices or grasses Dies:   Quiet Fire  words “Believe”, “Thanks and “Hello”            Impression Obsession : DIE253-U            Tonic Studios US : 77 E Butterfly Sprig & 76 E Dragonfly Brooch Spellbinders  Grand Calibur™ Machine 2 pieces of 8 ½ x 11 cinnamon card stock Envelopes to fit cards Westcott™ paper trimmer &a

Board drying

Image
Hi everyone, sorry I am a little late today with my posting and there should be no excuses to being late but I have been super busy with some art shows lately and I'm afraid my mind has been preoccupied so I hope you forgive me. I just got this new stamp set and it comes with little dies to cut out your image so let's take a minute and talk about stamping and die cutting handmade paper. When I stamp, I want a smooth flat surface devoid of any bumps or roughness, and this is how I get that type of surface. ( Please go here for your directions on making your own paper using the fabulous Arnold Grummer Papermill kits ) Tim Holtz Sizzix  BIRD CRAZY Thinlits Die And Cling Stamp Set  Arial font - size 20 printed through computer You can create many different surfaces with a lot of varying techniques. One of those techniques is how you go about drying your paper. I use a board drying technique which gives me a super flat surface on one side and a textured surface on

Paper Casting

Image
Hello,  Ann here today from the Arnold Grummer Design Team and Annmakes .  I have been enjoying making paper castings lately with some new moulds that I received.  Paper casting can be done in several ways.  Today I am showing you some examples of using moulds and Cotton Linters. Cotton Linters are a wonderful fiber to create with as the end product results in a very white and delicate finish. However, the Cotton Linter fibres create a very strong natural bond while the fineness of the fibres takes on any details in the moulds almost perfectly.  Of course the moulds can also be used with a regular paper pulp or clay. To make the pulp all you need are a few squares of Cotton linter, some water and a blender.  Mix it all up and pour through a sieve reserving the cotton pulp and draining the excess water.  Then pressing the cotton into the mould of choice, packing it firmly, and letting it dry.  It is also possible to speed up the drying process in a low temperature oven set f